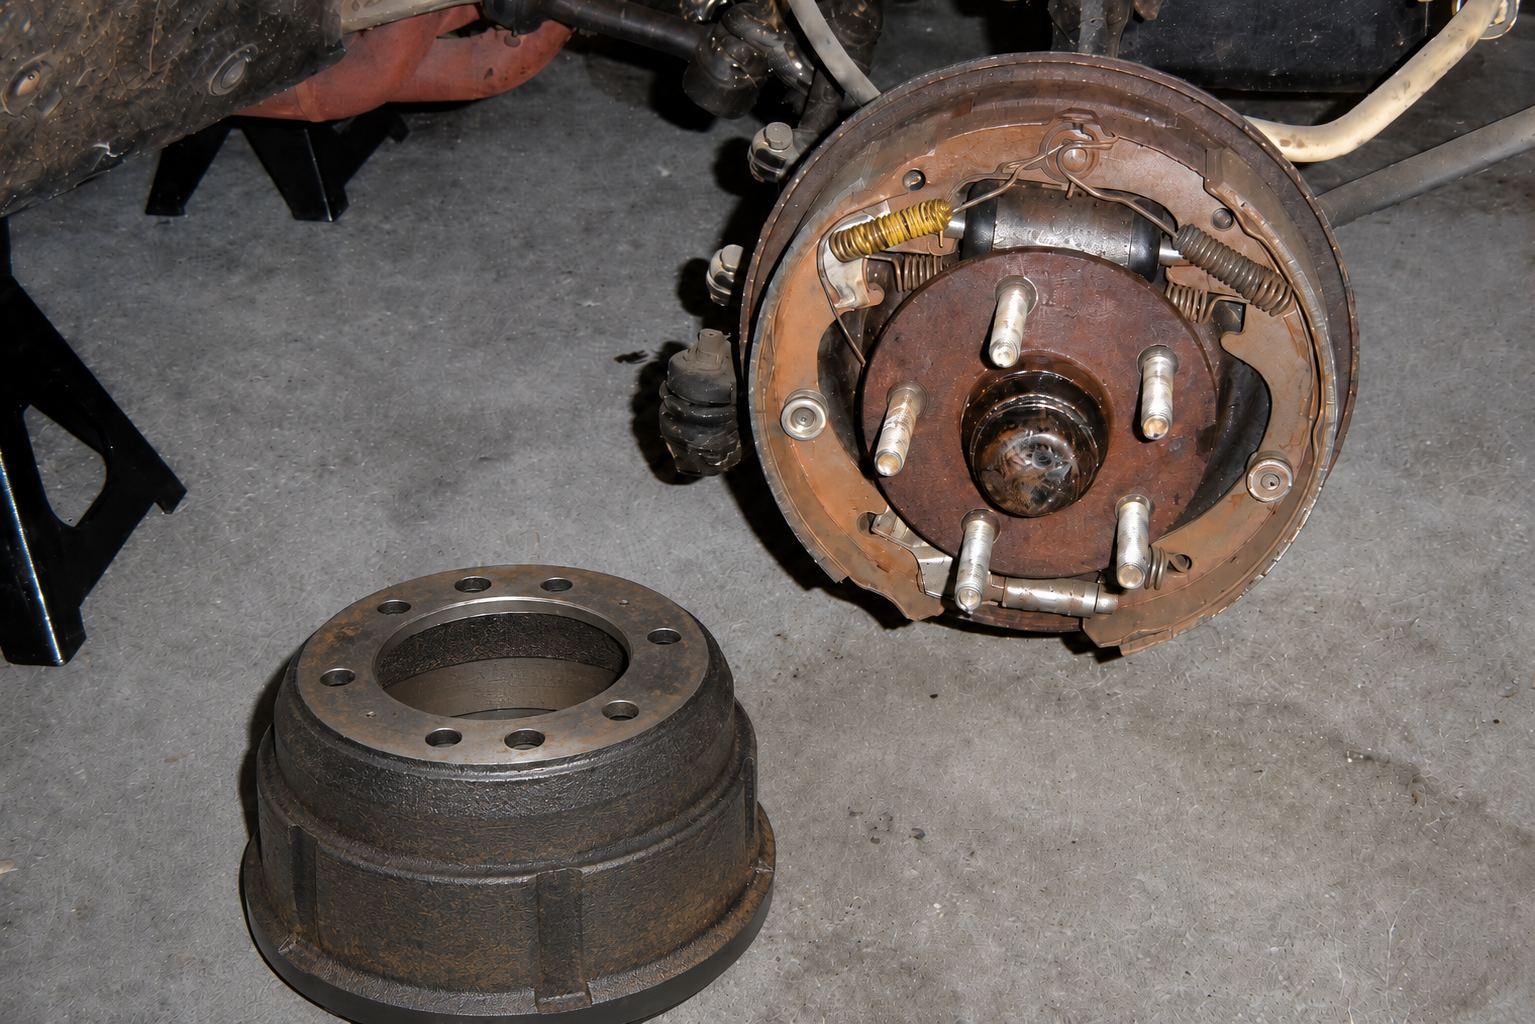
You did everything right. New shoes, new drums, new hardware kit, new wheel cylinders. The backing plate contact points were cleaned and lubed, the starwheel adjuster greased, the installation done by someone who clearly knew what they were doing. Then you pull out of the shop and there it is: a brake pulsation that wasn't there before the job — plus a faint flapping or scraping sound every time the shoes apply.
This isn't a rare fluke. We've seen a real-world case that took three sets of drums before the problem was traced — and of everything swapped, only one casting was actually out of round. The rest came down to mounting conditions and shoe clearance that ended up too tight after the first highway drive. This guide walks through how to diagnose drum-brake pulsation after a replacement, why brand-new drums can arrive out of spec, and the adjustment step most installers skip.
First, Confirm It's Actually the Rear Drums
Pedal pulsation can come from the front rotors, the rear drums, or even a hub or bearing. Isolate the axle through a controlled inspection and road test — not seat-of-the-pants guesswork:
- Timing. If the pulsation began immediately after the rear brake service and wasn't there before, the work just done is the prime suspect. That doesn't prove the drums are bad — it narrows the search to everything the job touched: drums, shoes, hardware, adjustment, and mounting.
- Speed-dependent symptoms. Out-of-round conditions produce a pulsation that follows wheel speed. Subtle or invisible in city driving, it becomes pronounced braking from 100+ km/h. If the complaint is "only on the highway," think runout, not lining contamination.
- Noise on apply. A rhythmic flapping, slapping, or scraping sound when the brakes apply is consistent with the shoes riding an out-of-round friction surface — contacting the high spot once per revolution.
- Measure, don't guess. Inspect the front rotors for runout and thickness variation, then measure the rear drums directly with a dial indicator (procedure below). Don't use the parking brake as a rolling diagnostic — configurations vary too much between vehicles (drum-in-hat, caliper-integrated, electronic), and stopping a moving vehicle with it isn't a safe test.
Why Brand-New Drums Can Be Out of Spec
"It's new, so it must be good" is the assumption that costs shops comeback labour. Manufacturing variation, residual casting stress, machining error, handling damage, and improper mounting can all contribute to an out-of-spec drum — which is why a new part should be inspected rather than assumed to be correct:
- Residual casting stress. Cast iron holds internal stresses from cooling. If those stresses aren't fully relieved before final machining, a drum that measured round at the factory can relax out of shape in storage or after its first heat cycles.
- Handling and shipping damage. Rough handling in transit can affect a casting — particularly larger, thinner-wall drums. Damage isn't always visible.
- Tolerance stacking and QC escapes. Every production line ships the occasional out-of-spec unit, whatever the brand or price point. Low-probability events happen — and when they do, everyone assumes the problem must be something else.
- Contamination at the hub face. This one isn't the drum's fault: rust scale, burrs, or debris trapped between the hub flange and the drum can prevent the drum from seating fully, creating installed runout even when the drum itself is within specification. The drum is round; it's just mounted crooked.
Several replacement drums showed excessive runout installed on the vehicle — but when the "bad" first set went on a brake lathe, one drum measured perfectly round; only its mate was out of round. Machining that single casting fixed the vehicle after three drum swaps. Installed runout and the drum's own out-of-round are two different measurements — separate them before you condemn parts.
It's Not Always the Drum: Installation and Bedding Conditions That Cause Similar Symptoms
Before blaming the casting, rule out the installation. These issues produce complaints that get written up as "bad new drum":
- Hub face not cleaned to bare metal. The single most common cause of "bad new drum" comebacks. Wire-wheel or flap-disc the hub flange until it's clean, flat metal — no rust scale, no old rubber ring residue.
- Uneven or unsequenced lug torque. Running nuts down with an impact in a circle pattern clamps the drum unevenly. Torque in a criss-cross sequence with a calibrated wrench.
- Shoe clearance too tight. The case-study twist: braking was smooth after install, then pulsation appeared mid-highway-drive — the shoe-to-drum clearance had closed up. A correctly assembled self-adjuster maintains clearance; it doesn't keep clamping the shoes tighter. If clearance keeps closing, check the initial setting, side-specific adjuster installation, parking-brake cable release, and shoe orientation. Over-tight adjustment can't make a round drum out of round — it magnifies an existing high spot into drag, heat, and a feelable pulse. Symptoms that change hours after the job point to adjustment, not parts.
- Shoes not yet bedded to the new drum. This is a different condition from runout, but it produces a similar complaint. New shoes contact a new drum on a narrow band until they conform — and incorrect shoe radius, contaminated linings, an improperly machined drum, or binding hardware can prevent them from ever seating evenly. The result is grabbing, noise, heat, and inconsistent braking that can be mistaken for an out-of-round drum.
The Diagnostic Sequence, Step by Step
- Check bearing and hub play first. Excessive play makes every runout reading meaningless — resolve it before interpreting anything downstream.
- Measure hub flange runout before mounting. Dial indicator on the bare flange, base secured to a stationary point. If the hub runs out, no drum will run true on it.
- Measure the installed drum — per the manufacturer's procedure. Secure the drum with lug nuts and flat washers tightened evenly to seating torque, mount the indicator base rigidly to the axle or knuckle, and read where the procedure specifies — many call for the internal friction surface, and outer-surface readings aren't interchangeable with it. Mark the high point. Limits vary widely between light vehicles and heavy trucks, so use the OE spec, not a rule of thumb.
- Index the drum on the hub. Where the design permits, rotate the drum one stud position and remeasure. If the high point moves with the drum, suspect the drum; if it stays with the hub, suspect the hub or mounting.
- Measure the full geometry, not just lateral runout. Drum diameter, out-of-round, taper, and bellmouth each have their own specs and their own symptoms.
- Inspect suspect drums independently. A properly maintained brake lathe with the correct adapters, clean mounting surfaces, and proper centring separates actual drum distortion from mounting error. A poor setup can itself create apparent runout — repeat the setup to verify the reading.
- Machine or replace. A lightly out-of-round drum that stays above its maximum inside-diameter (discard) spec after a cleanup cut is a legitimate machine-and-return. Anything at or past discard, or showing hard spots and heat checking, gets replaced.
Brake diagnosis, measurement points, runout limits, machining allowances, and discard specifications are all vehicle- and drum-specific. The steps above are a framework — the exact OE service procedure and specifications for the vehicle in front of you always govern.
Adjustment Matters — And It's Vehicle-Specific
Rear drum brakes with self-adjusters use a starwheel mechanism that ratchets one click at a time, but how that mechanism is actuated varies significantly by design: some adjust during reverse service-brake applications, some through parking-brake use, some during forward braking, and some require a specific manual procedure. Many adjusters and levers are also side-specific — a left-side adjuster installed on the right can adjust the wrong way or not at all. Check the service information for the vehicle before assuming any of it.
What's universal is this: a freshly installed drum brake isn't at its final adjustment when it leaves the bay, and if the initial manual setting was wrong — or the adjuster hardware is installed incorrectly, or the parking-brake cable isn't fully releasing — clearance can end up too tight, dragging the shoes against the drum's high spot and producing pulsation that wasn't there an hour earlier.
- Set initial shoe clearance manually with the starwheel, per the service manual — typically a very light drag when spinning the drum by hand, backed off just until it spins free.
- Complete the manufacturer's specified adjustment cycle. Depending on the design, that may be firm brake applies while reversing at low speed, parking-brake apply-and-release cycles, forward stops, or a manual-only adjustment.
- Road test. If pedal height or feel changes on the first drive, re-check the clearance and confirm the adjusters, levers, and springs are installed correctly for their side and that the parking-brake cables release fully.
Skipping this is why symptoms show up "hours later" and get blamed on the parts. In the real-world case, the final set of drums was condemned prematurely for exactly this reason — the pulsation that appeared on the highway disappeared completely after the clearance was corrected, and never came back.
The Fleet Takeaway: Spec Quality Drums, Verify Before Install
For a single vehicle, three drum swaps is a frustrating weekend. Across a fleet, it's a pattern that quietly drains money: parts credits and restocking, repeat bay time, a truck off the road for days, and a tech chasing a "mystery vibration" that a dial indicator would have caught in five minutes.
| Approach | Real Cost |
|---|---|
| Swap-and-hope | 3 drum pairs, 3 install labour charges, multiple road tests, days of downtime — and the root cause still unproven |
| Measure-first | One quality drum, one dial indicator check on the hub and installed drum, one adjustment cycle — done in a single visit |
The other half of the equation is what you put on the truck. Parts LogiQ selects the drums and rotors we supply for Hino and Isuzu applications for application accuracy, dimensional consistency, and dependable service performance — and regardless of brand, every drum should still be inspected, mounted on a clean hub, and adjusted according to the applicable service procedure. That measure-first philosophy is the same thinking behind our FleetUltra line: engineer out the comeback before the part ships.
- Bearing and hub play checked before any runout measurement
- Hub flange cleaned to bare, flat metal — no rust scale or burrs
- Hub flange runout measured with a dial indicator
- New drum runout verified per the OE procedure (installed, secured with lug nuts at seating torque)
- Lug nuts torqued to spec in a criss-cross sequence
- Manual starwheel set + the manufacturer's specified adjustment cycle completed
Frequently Asked Questions
Can new brake drums be warped out of the box?
Yes. Residual casting stress, machining error, handling or shipping damage, and manufacturing tolerance escapes can all leave a brand-new drum out of spec — from any brand. Measuring the drum with a dial indicator, properly secured to a clean and true hub, is the only way to confirm it is actually round.
How do I adjust drum brakes after replacement?
Set the initial shoe-to-drum clearance manually with the starwheel adjuster, then complete the vehicle manufacturer's specified adjustment procedure. Depending on the design, the self-adjuster may operate during reverse braking, parking-brake application, forward braking, or a combination — follow the service manual for your vehicle rather than assuming one method fits all.
Why do my brakes pulsate only at highway speed?
A small amount of drum out-of-roundness produces a low-amplitude pulsation that repeats once per wheel revolution. At city speeds the frequency is low enough to go unnoticed; at 100+ km/h the same runout cycles many times per second and becomes an obvious vibration under braking.
Should I machine or replace an out-of-round drum?
If machining leaves the drum above its maximum inside-diameter (discard) specification, turning it on a brake lathe is a legitimate fix — a lightly out-of-round drum often cleans up in one pass. If the cut would exceed the discard diameter, or the drum has hard spots or heat cracks, replace it with a quality, stress-relieved casting.