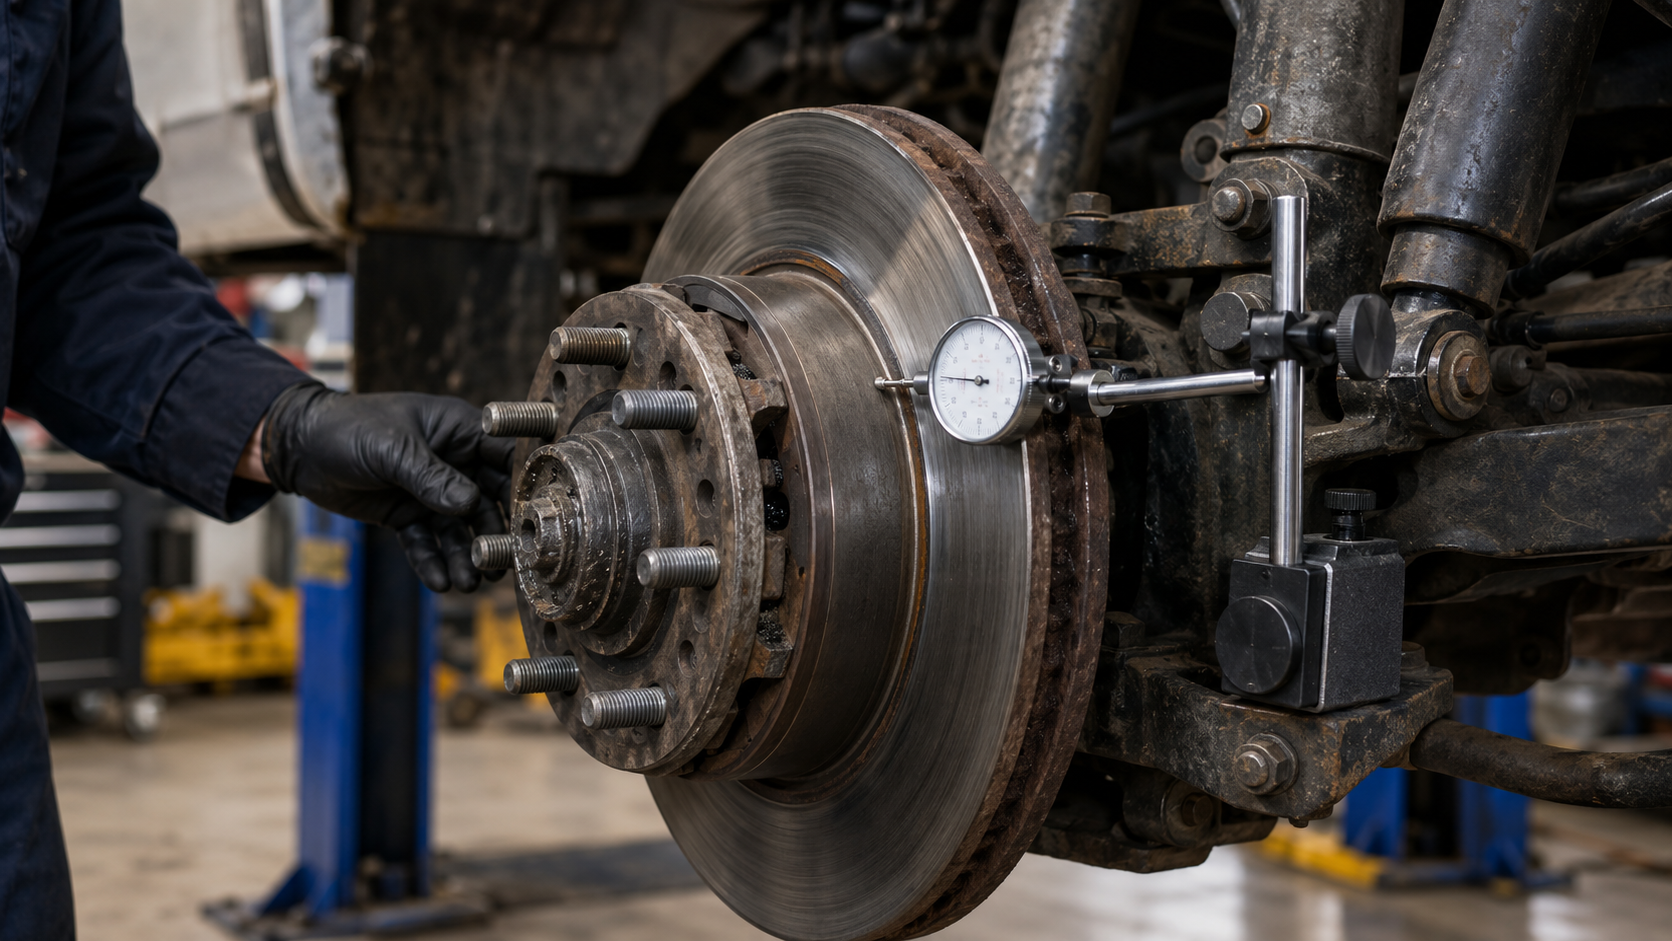
When a brake rotor wobbles off its true rotational plane, the industry calls it lateral runout — sometimes incorrectly called "warped rotors." True warping and runout-induced disc thickness variation (DTV) are distinct conditions, but whatever the root cause, the driver often feels the same symptom: a pulsating brake pedal, often paired with steering wheel shake under braking. It's one of the most common brake comebacks — and one of the most misdiagnosed, because the rotor itself isn't always the root cause. Excess lateral runout left uncorrected will wear thickness variation into the rotor over time, which is what ultimately produces the pulsation.
What Actually Causes Runout
Runout may or may not come with rotor thickness variation. If the rotor measures a consistent thickness all the way around but still wobbles, it's rotating off its true axis — and something other than the friction surface is to blame:
- Worn wheel bearing — excessive bearing play lets the whole assembly wander as the vehicle rolls
- Contaminated hub-to-hat mating surface — on hubless (thin-hat) rotors, a burr, rust scale, or grit between the hub flange and rotor hat tilts the rotor off axis
- Damaged hub flange — the flange itself can run out; measure it with the rotor removed to isolate it
- Improper wheel fastener torque — the most common cause on today's thin-hat rotors. Uneven or excessive lug torque literally distorts the rotor hat
- Heat damage — isolated hot spots or extreme heat cycles that permanently distort the disc
- Rust deposits — vehicles stored for long periods develop corrosion buildup where the pads contacted the rotor
Suspect a wheel installation issue? Loosen all wheel fasteners and retorque them in the correct sequence at the correct spec — one wheel at a time — then road test. If the pulsation changes after a proper retorque, wheel installation or hub/rotor clamping distortion is likely involved. If it improves but doesn't disappear, a light lathe cleanup can provide the final fix — but only resurface if the rotor will remain above the discard/minimum thickness specification after machining.
Step 1: Measure Rotor Thickness First
Before reaching for the dial indicator, verify the rotor is even serviceable. Measure thickness at eight equally spaced points around the rotor — never judge a rotor by a single spot. Excessive thickness variation is a direct cause of pedal pulsation, and gross variation will explain the complaint before you ever measure runout.
Use a micrometer designed for rotors, ideally one with a flat anvil on one side and a pointed anvil on the other. The pointed anvil reads the true minimum thickness at the bottom of grooves and scoring — a standard flat-anvil mic only touches the high spots and reads optimistic.
Step 2: Measure Lateral Runout
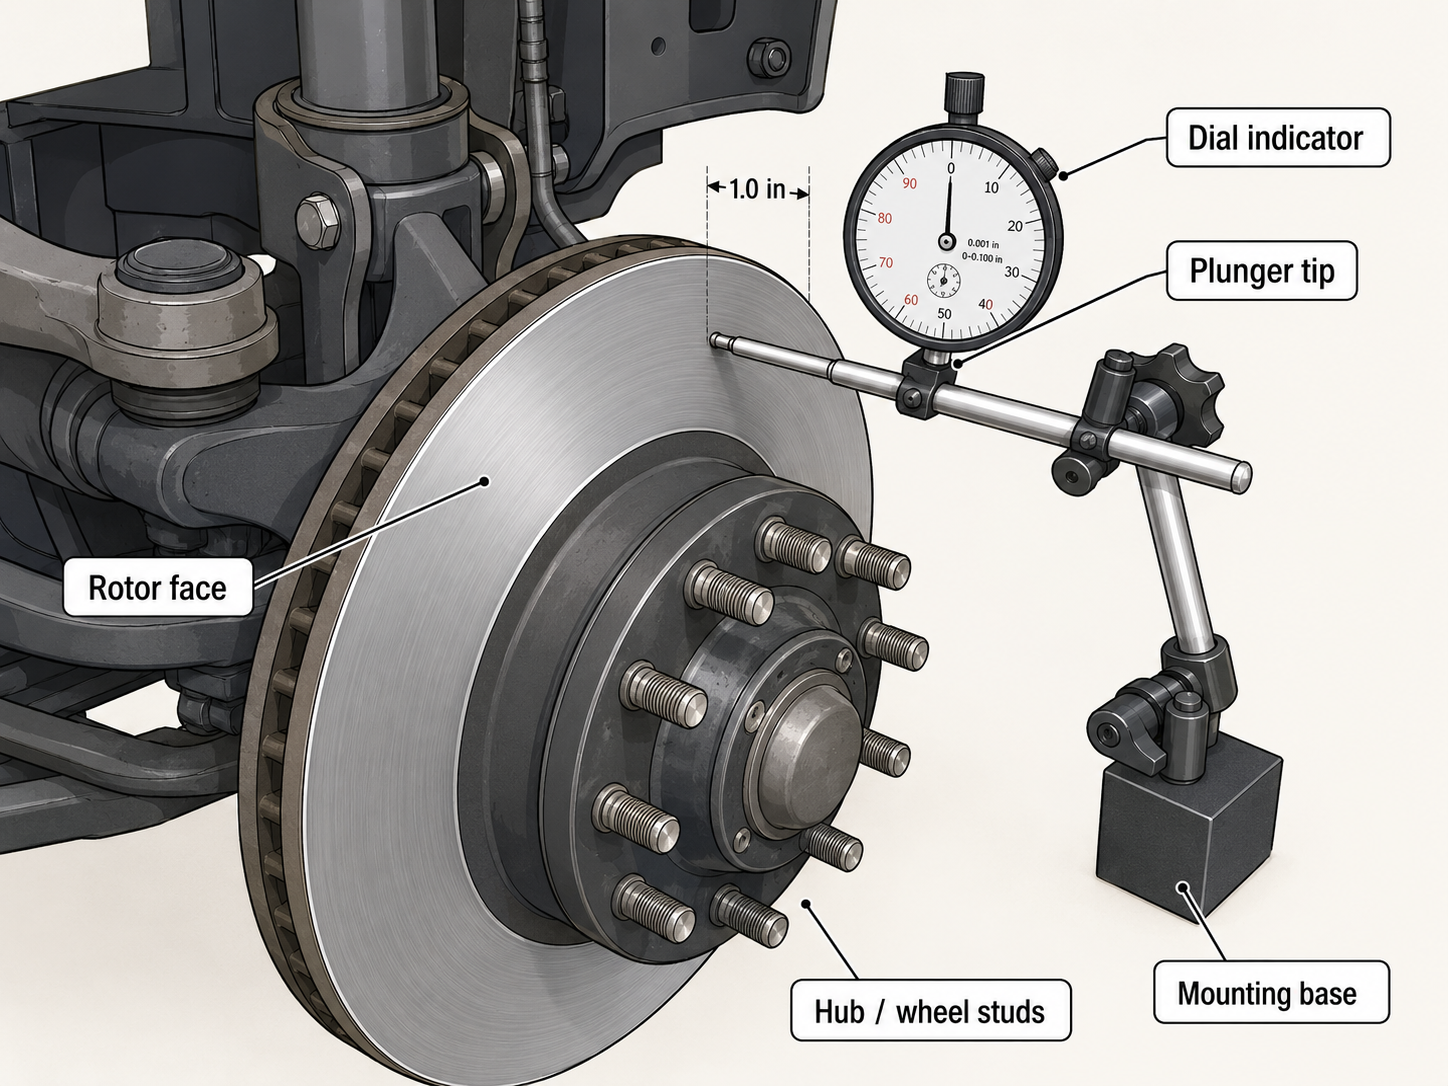
Runout takes a dial indicator on a rigid, adjustable mount. On the vehicle, clamp the fixture to a stationary point like the spindle or control arm. Position the indicator tip perpendicular to the rotor face, roughly 1/2" to 1" inboard from the outer friction edge, on a clean swept surface. Zero the dial, then rotate the rotor through a full 360°, watching for total indicated movement.
With the wheel removed, secure the rotor to the hub using lug nuts and suitable flat washers/spacers before measuring — a loose rotor can give a false runout reading.
Specs vary by make and model. Many hydraulic disc systems target .002" or less total indicated runout, so always compare your reading to the OE specification.
Indexing the Rotor to the Hub
On hubless rotors with excess runout, try re-clocking the rotor before condemning it. Chalk-mark one stud and the adjacent spot on the rotor hat, then rotate the rotor one stud position clockwise and re-measure. Because both the hub flange and the rotor hat carry small machining deviations, one position often "stacks" those deviations against each other and minimizes total assembled runout.
To take the hub out of the equation entirely, chuck the rotor on a lathe and measure it independently — and measure the bare hub flange too. If the flange is the source, no amount of rotor work will fix it.
Wheel Tightening: Where Most Warp Comes From
Preventing fastener-induced warp starts with hardware condition: studs with clean, undamaged threads, nuts in good shape, and no dirt or grit on any threaded surface — contaminated threads throw off torque readings badly. Never run wheel nuts down with an impact gun and a standard socket. On alloy wheels and thin-hat rotors especially, if an impact is used at all, use it only to snug the nuts lightly — final tightening should be done with a calibrated torque wrench in the correct sequence.
Always tighten in a criss-cross sequence to distribute clamping force evenly across the wheel and rotor hat:
| Wheel | Tightening Sequence (clock positions) |
|---|---|
| 4-bolt | 12 → 6 → 9 → 3 |
| 5-bolt | 12 → 5 → 10 → 2 → 7 |
| 6-bolt | 12 → 6 → 2 → 7 → 5 → 10 |
When Runout Keeps Coming Back
Resurfaced the rotor and the customer is back with the same pulsation? Something is dragging the pads and re-warping the rotor with heat. A rotational drag test isolates it: apply and release the pedal several times, then rotate the wheel with a beam-type torque wrench on a lug nut and note the drag. Crack the caliper bleeder to dump pressure and test again.
- Drag dropped with the bleeder open? The problem is hydraulic — check pedal linkage binding, a sticking booster valve, a master cylinder piston that isn't fully returning, fluid contamination (swollen rubber parts), or a restricted line or hose. Open connections working downstream from the master cylinder until the drag releases; the last component you opened before the drag dropped is the restriction.
- Drag unchanged with the bleeder open? The problem is mechanical — a seized caliper piston or dry, corroded slide pins. Rebuild or replace the caliper, clean and lube the slides with silicone grease only, and check that rear brakes are pulling their share (weak rear brakes overwork the fronts and build heat).
One more thing on "fixed" rotors: a rotor that repeatedly develops pulsation after machining has usually been overheated, stressed, worn near minimum thickness, or is being affected by an unresolved hub, bearing, torque, or caliper-drag issue. In repeat cases, replacement is usually the better repair — not another cut.
- Wheel fasteners: even torque, correct spec, correct sequence
- Hub-to-hat contact surface: clean, no rust scale or burrs
- Hub flange runout: measure with rotor removed
- Wheel bearing: check for play
- Rotor thickness variation: 8-point micrometer check
- Heat damage / hot spots / isolated corrosion buildup